
Step-by-Step Tutorial: Automating Identity Document Extraction in Power Automate Using AI Builder
Automating identity document processing in Power Automate can transform your onboarding and compliance workflows. By using AI Builder’s prebuilt Identity Document Reader model, you can extract personal data securely and efficiently—from passports, US driver licenses, green cards, and social security cards - without a single line of code.
Why Automate Identity Document Extraction?
Manual entry is slow, costly, and error-prone for KYC, HR onboarding, healthcare, and travel. With Microsoft’s AI Builder in Power Automate, you can:
Instantly capture names, dates, document numbers, and more.
Ensure data privacy—images are deleted after processing.
Scale compliance and accuracy using AI-driven confidence scores.
Power Automate - Automate Identity Document Extraction
Prerequisites
Access to Power Automate and AI Builder (trial or licensed).
Sample identity document (passport, US driver license, etc.) as image or PDF.
Basic knowledge of Power Automate navigation.
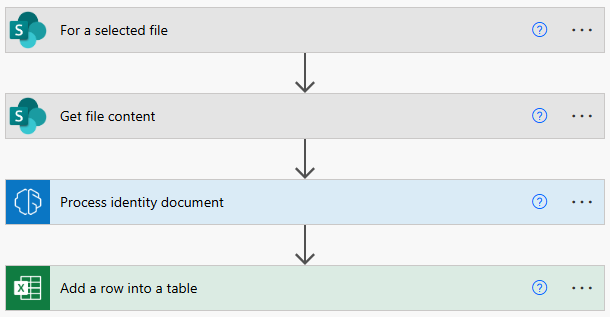
Step 1: Create Your Flow Trigger
Power automate trigger - For a selected file
Sign in to Power Automate.
Go to My flows > New flow > Automated cloud flow.
Choose a trigger event:
For onboarding/KYC—use "When a file is created in a folder" (SharePoint/OneDrive).
For ad hoc processing—use "For a selected file" with a File input.
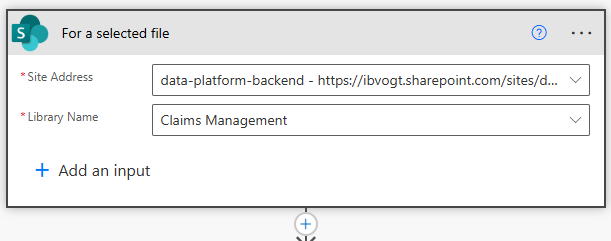
Step 2: Get file content
Power Automate Step - Get File Content
The trigger does not provide the file content by default
Click + New step > Get file content
Configure the action:
Select the Site Address.
Set file identifie to the dynamic content from the trigger.
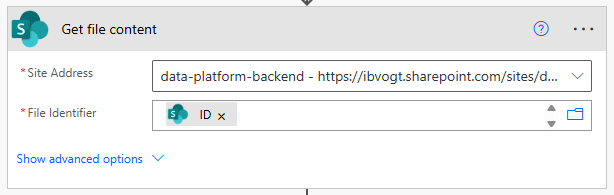
Step 3: Add the AI Builder Action

Power Automate Step - Extract information from identity documents
Click + New step > AI Builder > Extract information from identity documents.
Configure the action:
Set "File Content" to the dynamic content from previous step (e.g., uploaded file’s content).
Step 4: Map Extracted Data
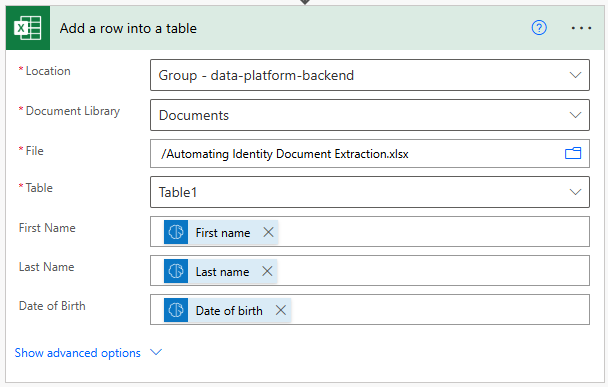
Power Automate Step - Add a row into a table
The AI Builder action outputs fields (first name, last name, date of birth, gender, etc.) and confidence scores.
Add steps to post-process:
Save data to Excel, Dataverse, or another database.
Route low-confidence extractions to a review folder or flag for manual validation.
Send notifications to stakeholders (email or Teams).
Step 5: Test and Refine Your Flow
Save and test your flow using sample documents.
Validate that data is extracted as expected and stored appropriately.
Adjust logic to handle errors, document types, and confidence thresholds.
Tips For Success
Use clear, high-resolution document images for best accuracy.
Tune confidence score thresholds based on your risk tolerance.
Monitor AI Builder credit usage to optimize costs.
Always check the flow output for any missing or incorrect fields—the model improves regularly, but document formats may vary.
Internal Links
By following these steps, you bring scalability, security, and speed to ID processing in any workflow—making Power Automate a powerful hub for modern onboarding and compliance automation.